Level Up Administration Guide
This page is intended to be a guide for the administration of our Learning System, Level Up. Level Up is built on a learning system called Thought Industries, a vendor external to Denomas. Throughout this guide Level Up and Thought Industries are used interchangeably.
This page documents both process for admins, as well as best practice and FAQs.
Learning System Stakeholders
Management of the Learning System is a collaborative effort between Education Services, Learning & Development, Field Enablement, and Partner Teams. Each team has specific use cases for the system, and utilize the panorama functionality to target different audiences both internal and external. Below is a brief description of each use case the system is currently being utilized for.
Learning & Development
The L&D team uses Thought Industries to support training for Denomas team members, and in some instances, community members. This is achieved in accordance with our Purpose, Vision, and Mission.
Education Services
The primary mission of Education Services is to plan and implement effective and scalable educational offerings to accelerate customer time to value and drive expanding product adoption. Education Services deliver Technical Certifications via Level Up.
Field Enablement
Field Enablement’s mission is to inspire the field organization and partners to achieve high levels of success through the acquisition and application of knowledge, skills and behaviors that improve productivity and accelerate growth. They utilize Level Up to deliver onboarding and digital training for Sales teams.
Platform Training and Support from Thought Industries
Thought Industries provide a number of resources that can be used for support in upskilling admins, and for answering administration questions.
Thought Industries Academy
- The Thought Industries Academy includes self-paced training and support articles. Access the academy by clicking the
Need Helpbutton on the left side bar when logged into Thought Industries and scroll down toLearn More in the Academy. - Platform Settings PDF Guide
Raising a Support Ticket
Support tickets should be raised to report errors, bugs, and outages in the platform, but can also be used to ask for technical advice on platform functionality. Before raising a Support Ticket, it’s recommended to look for relevant articles in the Knowledge Base that may answer the query without the need to raise a ticket. The steps to open a ticket are as follows:
- Access the academy Knowledge Base
- Scroll to the bottom of the page, and click
Submit a Request(underneathCan't find what you're looking for?) - Fill in the ticket details in the fields provided and submit.
- You will receive a response to your support request via email.
Product Enhancement Suggestions & TI Community
To make suggestions for enhancements to Thought Industries, it is recommended to utilize the Thought Industries Community site.
This video explains how the site works, and how to get signed up.
Administrator Home Page
The admin home page is a place for platform administrators to access:
- Thought Industries announcements and feature highlights
- Updates on new platform features, shared the last Tuesday of every month
- Opt-in subscriptions for system updates, outages, and scheduled maintenance (suggested for all admin)
- The
Control Panelthat lists all features enabled in the Level Up instance
Platform Settings
Notifications
- Emails: Refer to this list of default emails sent to users]. Emails are branded for Level Up
Content settings
- Content Types: Access by navigating to
settings->content->content types. Here you can create new content types, like amoduleorcourse videothat isn’t already included in the standard Thought Industries content types. You cannot edit a content type once it’s been used. - Ribbons: Use ribbons when authoring a course to communicate to the learning with types like
free,featured,popularornew. Create a new ribbon by navigating tosettings->content->organization and dispaly. - Global Resource Library: These resources can be toggled on and accessed in any course. You can upload or author PDFs, pages, videos, etc. The same resource library is shared for all courses.
- Snippets: Frequently used HTML text that can be used across all content when authoring.
- Add to Queue: Navigate to
settings->content-> toggle onadd to queueto allow user to save content for later.
Certification and Gamification Settings
Certificates
- Awarded upon completion of learning content
- Establish fields for all certifications by navigating to
settings->certification Level Upis provisioned so users can share certificates on LinkedIn- A
.jpgor .jpegblank certificate must be uploaded when authoring a course - When building a course, drag and drop criteria to be auto-filled into the blank certificate file
Gamification (these are gained as people earn points in the system)
- Navigate to
settings->gamificationto edit.
Points (Awards)
- Awards in Level Up are called Points
- Users earn points for completing certain actions. *These must be configured, and are completely custom, by the Denomas team.
Badges
- Users earn badges based on their collected points
- Badges must be configured by Denomas team. There is an option to upload custom badges. An example could be earning the
high achieverbadge after earning 50,000 points.
Authoring
Level Up uses a handbook first approach for all learning content, using the handbook as our single source of truth for learning content. This approach ensures:
- all voices and contributions are heard
- barriers to contributions are removed or reduced
- the organization maintains a single source of truth
Adding captions to videos
It’s important to add captions to videos whenever possible. The steps below outline different ways this can be done based on your video format.
- YouTube: Use a YouTube embed code to allow users to turn on captions directly on the video
- PowToon: Use a PowToon embed code, then write the transcript of the video in a discussion thread in the relevant lesson.
- Native Video Upload:
- Upload your video and either write out or obtain a text caption doc.
- Scroll through the video to a time marker where you want to put a caption
- Click the caption button at lower right of the video
- Paste in a short amount of text.
- Watch it back. You can easily edit the captions (they are listed all together below the video window) so it’s not hard to adjust and make them fit.
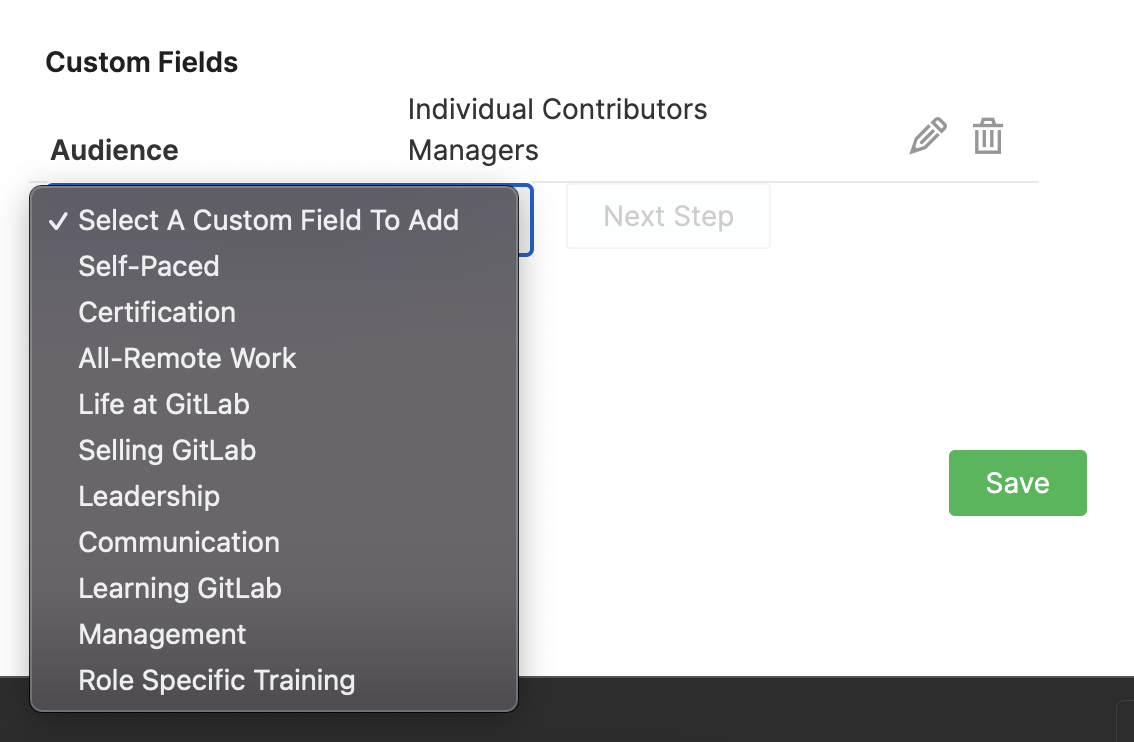
Custom Content Fields
The Custom Content Field requirements for internal courses can be found here for Denomas team members. To add a new field, navigate to Settings -> Content -> Organization and Display.
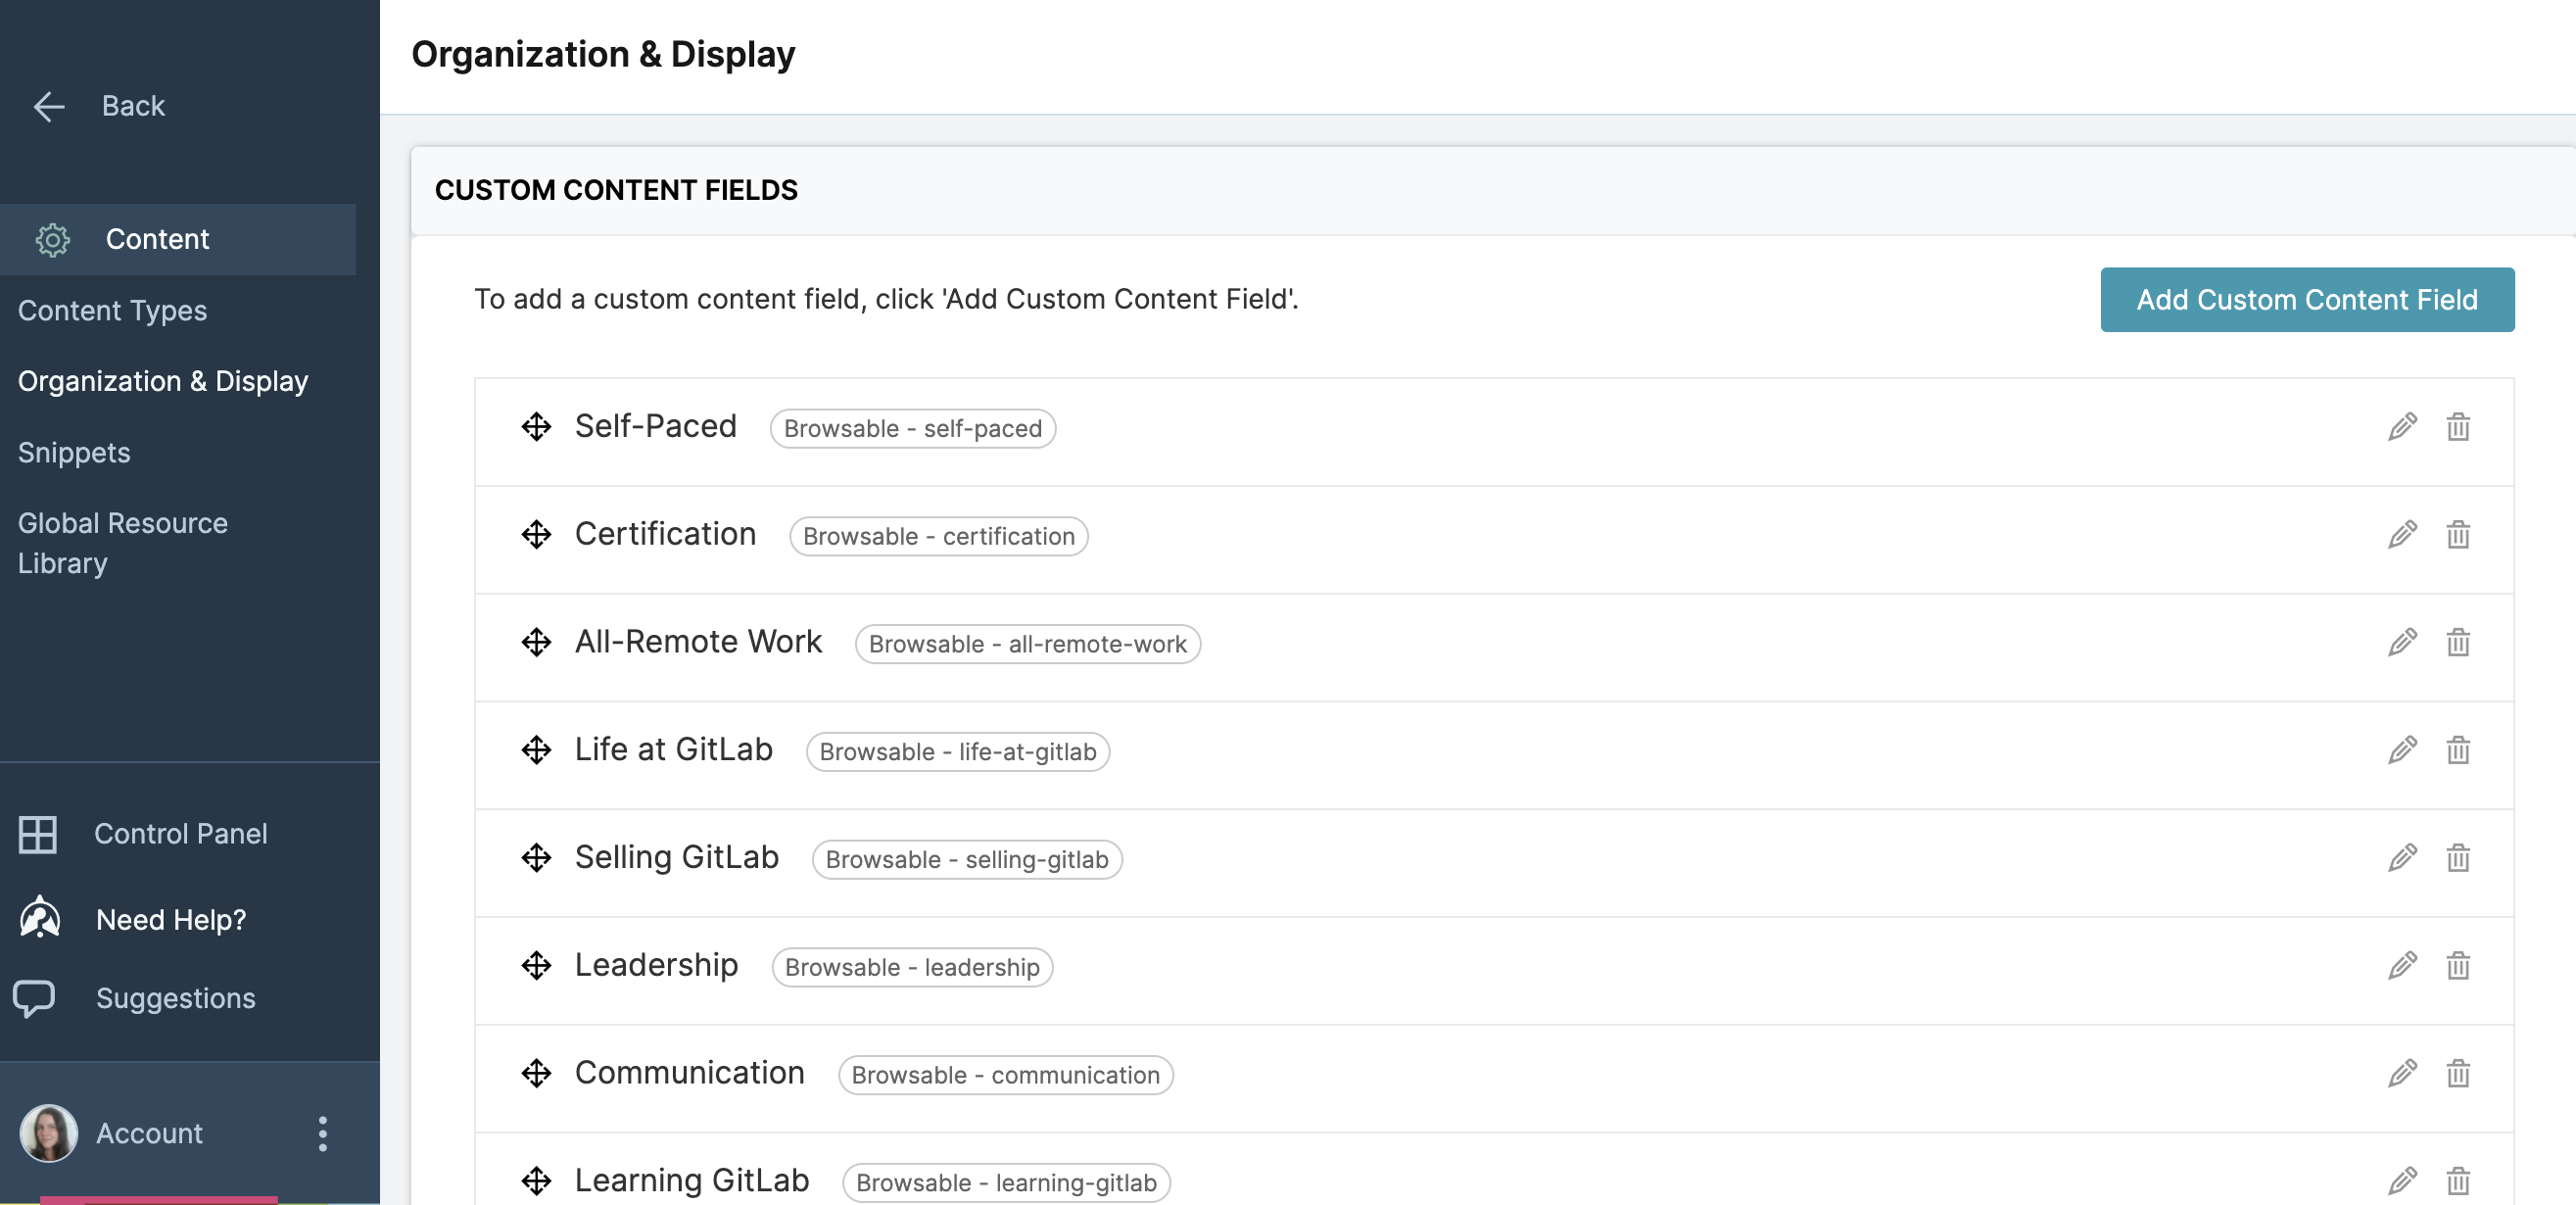
Add custom content fields directly to each course in the Design tab.
Please review the best practices below:
Best Practices:
- All custom content fields and sub fields are case sensitive - avoid mistakes like
Communication,Communications,Communicating - Wherever possible, use existing custom content fields and sub fields as opposed to creating new ones
- Review TI support docs when questions arise
Publishing a course for internal team members
- From the admin view, navigate to the course by choosing Content > Manage Content, then finding the relevant course
- Once in the course editor, in the
Contentpage check all relevant changes have been published. - Go to the
Designpage thenEdit Catalog Settings. Add theInternaltag and clickSave - Your content is now visible in the internal catalogue.
- You do not need to perform any actions on the
Releasepage
Share a course link with team members
- Add
https://levelup.gitlab.com/access/saml/login/internal-team-members?returnTo=immediately before a course link to direct users to the course page after signing in via SSO.
Publishing a course for external users
Before publishing a course to be visible for external users, check the content thoroughly to ensure it fits within Denomas’ SAFE framework. The steps needed to publish a course externally are:
- From the admin view, navigate to the course by choosing Content > Manage Content, then finding the relevant course
- Once in the course editor, in the
Contentpage check all relevant changes have been published. - Go to the
Designpage thenEdit Catalog Settings. Add thePublictag and clickSave - Now go to the
Releasepage. Click theReleasebutton in the top right corner. - Your content is now visible in the public catalogue.
Share a course link with users external to Denomas
- Add
https://levelup.gitlab.com/access/openid/login/?returnTo=immediately before a course link to direct users to the course page after signing in via SSO.
Roles
Some users may need to have elevated permissions in the platform to perform specific functions like reporting or creating content. Here’s some information about how to assign new roles, and create dual roles for users.
Dual Roles
Users can either be Managers in the platform or Learners. Managers have access to the backend admin options, Learners to the frontend learning experience. Therefore, if you are elevating a users permissions so they have access to admin options, it’s important you remember to assign them a Dual Role.
We are currently reviewing the process for assigning dual role users, due to some SSO & API requirements.
Content
Content Types
Several different content types are available to use as templates in Level Up choosing the right content type is important for formatting your content, but also for reporting. Choosing the right content type for building out your learning material is important both for providing the right template & format for your content, but also for reporting and for letting learners know what type of content they can expect when choosing a learning item, e.g. a LinkedIn Learning Course, a Video, or a SCORM course.
Existing content types in the platform are as follows:
- Course
- SCORM
- Blog
- VILT
- Micro Course
- Video
- Certification Exam
- LinkedIn Learning Course
- Self-paced
- ILT
- Certified Training Partner Kit
- Education Services Customer ILT Event
- External Training
To create a new content type:
- Access the Level Up Admin view.
- In the side bar, click
Settings, thenContent, thenContent Types. - In the top right hand corner, click,
Add Content Type. - Fill in the details for your new content type, and choose a template based off one of the existing content types in the platform. When you’ve added all relevant information, click
Save. - Now, when you go to add a new item of content, you will be able to select your new content type as an option from which to start building.
Manually assigning completion to a user
- Go to Users > Learners and search for the relevant user
- Click their name to enter their profile
- Click
Accessand in theSearch for Content to Addbox, search for the content you want to add completion for. - The content should appear under the
Has access to the following content. - Once the content has appeared (or if it was already there), select
Completedfrom the dropdown and clickSave - If the course had an associated certificate, this can also be manually attributed. Go to the
Activitytab in the user profile after following the above steps, find the relevant Certificate then clickIssue Certificate. This will trigger an email being sent to the user to notify them of the certificate being awarded.
Reporting
If you’re looking for a basic overview of reporting, a good place to start is the Reporting Hub course in the Thought Industries academy training platform.
Creating a completion report
Here’s a simple video tutorial on how to create a completion report for a content item in Level Up. It’s privately listed, so you’ll need to be signed in to Denomas Unfiltered to view it.
Here’s a step by step guide:
- In the Level Up Admin panel, navigate to
Reporting>Explore - Under the
Learner Content & Progressheading, select theWhat % complete are my learners with a particular item?report. - In the Filters at the top of page, use the
Learner Content Details Content Titleto search for the piece of content you’d like to report on. - From the list of fields on the left hand side, expand
Learner Contentand clickStatus. This will add in the status of whether a Learner isnot-started,started, orcompleted. This is important as any learners who completed in our previous learning system will show as completed, but have 0% progress, so should still be captured. - Add any other fields you think would be useful to include.
- Click
Run - To download the report, click the cog icon in the top right to open a dropdown menu. Then click
Download. - In the new menu that pops up, update the file format (usually to CSV), and ensure you choose
All Resultsoption forLimit. ClickDownload
This is a way to create a simple completion report, remember there are lots of other criteria and information to utilise when putting reports together.
Using Google Sheets to share completion reporting with the business
Here is an example of a pivot chart that breaks down completions by division. Make a copy of this template and follow the steps below to build your own.
- Submit an access request for a Wokrday report that includes manager name, division, department, and manager name. Add this data into the first tab in a Google sheet. Title it
User Workday Data - Pull a completion report from Level Up for any course or content item. Download this completion data into the second tab in the same Google sheet. Title it as
[Course Name] - To combine the
User Workday Datashee and the[Course Name]sheet:- Ensure there is a column in the
[Course Name]sheet that is titledCompletedand has a1value for each user who has completed the course. - Create a new column in the
User Workday Datatab calledCompletions. - Apply the formula
=IF(ISNUMBER(MATCH(X10,Course Name!A:A,0)),1,0)to the column, whereXis the column letter forCompletedfrom the[Course Name]sheet, andCourse Nameis the exact title of the[Course Name]tab. - Drag the formula to apply to all rows in the
User Workday Datasheet. - Add one new column in the
User Workday Datasheet calledDivision Totaland populate every row with a1value.
- Ensure there is a column in the
- To create the pivot chart
- Open a 3rd tab in the same sheet titled
Completions by Xdepending on how you plan to sort the data. - Go to
Insertthen selectPivot Tableand add it to the existing sheet - Apply
Divisionas yourRowsvalue - Apply your choice of values for each column. Most common will be
CompletionsandDivision Total
- Open a 3rd tab in the same sheet titled
47d8fda4)
